Showing posts with label Album Ideas. Show all posts

Wednesday, May 2, 2012

More Ideas for Your Divided Page Protectors


The reason I chose the theme of divided page protectors for this Month's Roundup Workshop, is that I keep seeing them used all over the internet and in the store, and it's such a great way to scrapbook quickly and still stylish-ly!

I've been reminded by a few people, my husband included, that the idea of using an album with divided page protectors is not new.  Many of us probably had books where we could slide photos into the pages over the years.  The idea seemed to disappear with the advent of modern style scrapbooking and reappear in recent years with the growth of the Project Life album system.  The Project Life system, made popular by Becky Higgins, is a simple way of organizing your scrapbooking, using journaling cards, divided page protectors and 3-ring binders.

But the more I look over Project Life albums on the internet and in person, the more I believe that we can all have this type of album, in more of an individual style, by using divided page protectors (like the WeR Memory Keepers ones we stock in the store) and our own favorite papers and embellishments.

In the class handout, I have described many different configurations of divided page protectors and give you examples I have created.

Since I was inspired by many of the layouts I found on the internet, I wanted to share those with you too.  So here is a small compilation of what I have found...to inspire you!  Click on the photos to link to the blogs and pages where I found them.


Project Life by Ali Edwards
Check out the PL section on her blog for TONS of inspiration!


...by Deb Duty


Jessica is a digital scrapper, but her layouts provide a great inspiration for us paper scrappers too!


Of course, Kelly has tons of beautiful pages on her blog, but I chose this one because she added a smaller page protector in between her larger ones here.  I find that doing this adds a little surprise and something unexpected to your album.  You could add a small 4" x 6" pocket, adhered to one of your page protectors or stick in a 6" x 6" or 8 1/2" x 11".  Whatever size you use, you create a focal point by switching up the sizes of your pages.


I chose this double page spread from all of Lindsay's AMAZING layouts because, it shows how you can combine a divided page protector with a simple 12" x 12" layout/page protector.
Lindsay is a digital scrapbooker and uses a multitude of layout designs in her album, so be sure to click over and see everything on her blog!
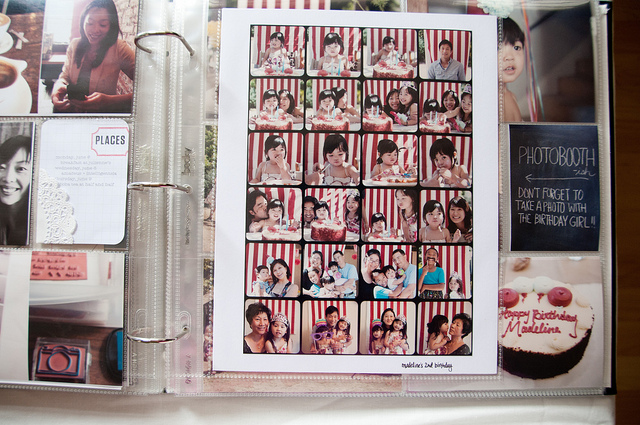

Liz also uses page protectors of varying sizes in her albums and has TONS of photos on her blog!


Imagine how simple it is will be to create pages for the holidays with divided page protectors!
And notice how Loni mixes up the styles of page protectors in her album.

If you're interested in stitching on your layouts, even when you use divided page protector layouts, check out Marcy Penner's Blog!


Mary Ann combines different size page protectors and all sorts of little embellishments in her album!


I like this close up of Michelle's page protector.  It's very cool how she stitches on tons of things in her books and I think a spot for Random Receipts would be a fun addition to our Roundup Layouts too!

Another cool post on Michelle's blog features some little Mother's Day notebooks, decorated with the papers contained in your April kit!


Now, I know this isn't a layout...but it IS a very cool idea!  Use a transparency, cut to fit your page protector to mount a photo or embellishment!  Even when we're using divided page protectors, it's fine to think outside the box and get creative with our embellishments.  Monica does have tons of other divided page protector layouts on her blog, so be sure to check them out.


Sheri is a digital scrapbooker who makes lovely layouts in the style of divided page protectors.  These layouts show how we can use regular paper 12" x 12" scrapbook pages to create a divided page protector style Monthly Roundup layout.


I hope you're inspired to try a divided page layout or two...or to start an entire divided page protector album!

For even more inspiration...stop by my Pinterest Page and check out the Project Life Board!

Follow Me on Pinterest

Tuesday, September 29, 2009

Cheerleader Mini Album by Gina Smith


Fall is here, and that means the kids are busy with sports & activities! This mini album was created by Whimzee's customer, Gina Smith. Gina used our custom high school papers from Stamping Station and a 7 Gypsies album. (Album size is 6" x 8", page size is 6" x 6".) This album showcases Gina's daughter's youth cheerleading experience. (After reading the article, scroll down to see the inside pages.) This album shows us that you don't have to have a child in high school to use these cool custom papers. You might use them to create an album for your child's youth sports season. And if you do have a high schooler, you could use this idea to create an album celebrating a special event in your child's high school years. Still need some ideas...how about marching band, science fairs, school plays, homecoming, drill team or just freshman year. Twila scraplifted this idea and created a mini album she plans to use to document her son's high school football season at Aloha. We'll share her album soon!

Yes, we all scraplift, even those of us who are seasoned scrappers, in fact seasoned scrappers probably to scraplift more often than beginners. Scraplifting is a term used by scrapbookers to describe borrowing an idea from another scrapbooker. You might recreate an entire page layout from the design to the papers & embellishments used. You might use another person's design and placement of page elements while using different papers & embellishments. You might borrow only the color scheme of the layout, card or project. These are all forms of scraplifting.

For those of you out there who are beginners, don't be afraid to scraplift! In scrapbooking, we consider it the highest form of flattery when someone appreciates one of our creations enough to scraplift it!


Monday, July 27, 2009

Twila's Baseball Mini Album

We just don't have enough room in the newsletter to share all the photos we'd like to share with you. That's one more reason why we like our blog so much! Scroll down in this post to see all the cool inside pages of Twila's Baseball Pennant Mini Album. She created it using the Party Banner Mini Chipboard book from Creative Imaginations's Bare Elements collection and our new baseball papers & cardstock stickers from Reminisce. Of course she added some ribbon, felt & other embellishments along the way too! Check it out!


Monday, March 9, 2009

Graphic 45 @ CHA

I know this has been a long time coming! Sorry it's taken so long! This is the first group of almost 200 photos Twila took at CHA last month. I'm going to post them in groups so it will be easier for you to locate the manufacturers you're looking for.

I think you'll love all the creative ways the Graphic 45 designers have used their papers. I'm planning to use them to cover my grandma's train case. After I looked at all these photos, it seems like the perfect surface for a few of these retro Graphic 45 patterns.

Enjoy!


If you have any problems viewing the slideshow, please click on this link to view it on photoshop.com.

Saturday, December 6, 2008

Julie's Acrylic Album Class #1

(Please do not copy our photos or text and paste into another site or print them out. Instead, please pass on a link to our site to anyone who may find this online class useful. Thank you!)

For this class, I'm sharing the steps I went through to create my first acrylic album. I know that many of you are curious about these albums and are looking for ideas to help you create your own. During my creative process, I looked through scrapbooking magazines, idea books and websites. I gathered my favorite ideas and techniques to create an original acrylic album as a 40th Birthday gift for my friend Teresa. Teresa's 40th Birthday Party was a Barndance with a Western theme, so I used that theme to begin my search through Whimzee's Scrapbook Studio for the supplies to create the album.

In this class, I explain the techniques I used to create each page of the album. Please feel free to use this class as a rough guideline in the creation of your own acrylic album. It is not my intention that your album be an exact copy of mine. I think that it's important to find your own theme and supplies that suite your theme. If you need help developing a plan for your album, I'd love to hear your questions in the comment sections in this blog. Also, we'd love to help you choose your supplies at the store, just ask one of the Whimzee's Girls for help on your next visit.

Most of all, don't be afraid to embark on your own acrylic album adventure. The final product will be a beautiful, one-of-a-kind collection of memories of your special event. I'd love to see photos of your creations! Good Luck & see you in the store!

Julie's Acrylic Album Class #2


After deciding to make an acrylic album, my first step was to choose the size, I choose 6”x6”. The album I chose came with 3 silver hinged rings and is packaged in a shimmery gold bag, perfect for gift giving. We have some great new acrylic albums in the store from Clear Scraps & Bo Bunny.

My next step was to head for the Western & Farm section in the store. I was looking for a selection of papers that would include red, blue and some neutrals. A red bandana pattern by Creative Imaginations, was the first to catch my eye. Next, I found a blue bandana pattern with horses in its pattern by Karen Foster. Then, I remembered a floral on a red background that reminded me of calico, it’s a fun paper named Organic Poppy by Bo Bunny. It isn’t Western but I thought I could work it in with my theme. I headed back to the Western section and found a paper with a pile of rope on it named Lasso by Karen Foster. I added a brown & white lined “notebook” paper by Creative Café. Next, I came a cross a denim print, Blue Jean by Paper Adventures. My other choices came out of our clearance bins. We had a couple papers with white washed or distressed wood on them and one covered with old yardsticks. I thought the yardsticks (Folded Wood Tape Measures by K & Company) would be a fun addition. I wanted use the 40’s on the rulers somewhere in my album and the color & textures of the rulers fit in with a Western theme.

Once I had a good selection of paper, I started thinking about embellishments. I looked through my Grungeboard alphabet and took out the sheet of “T”s. I was sad that my set didn’t include numbers. I decided that I would cut a big 40 for the front cover on the Cricut diecut machine. As I was looking all through the store, I came across a large set of letters and numbers in a cupboard that Twila had used for one of her projects. I was excited to find a large 4 & 0 in a font that fit nicely with my theme. But if you can’t find something appropriate for your cover, do consider cutting your letters or numbers on the Cricut. In the store, we have the large Cricut that cuts shapes up to 12” . I chose some rubons with birthday, celebration and friend themes by KaiserCraft and Creative Café. For the back page, both inside and outside, I picked two square frames by Wild Asparagus.

To add a special flair to my album, I chose a transparency by Artistic Expressions called Celebrate. My last addition to my collection was paint. I wanted to use brown paint for the edges of some of my papers and as a background on my inside pages. As usual, I couldn’t find the exact color I wanted, so I chose a brown that was the closest I could find. Then I grabbed a black, a red and a metallic gold. I find that mixing metallic colors with any of my paints gives them an extra depth. You don’t need much, in fact, my gold paint was almost empty, I had to use a toothpick to reach in & get enough out for mixing.

I grabbed some last minute embellishments that I thought fit into my theme, unsure exactly where I would use them: Creative Café’s red felt pocket with a scalloped edge, Creative Café buttons in light blue, red & brown, thin twine in red, blue and ivory, Creative Café brown felt flower trim, 3 bronze hinged rings and a few pieces of coordinating ribbon.

For my adhesives, I chose hermafix squares, spray adhesive and Diamond Glaze. I wasn’t sure at first which adhesive to use, so I wanted to have a choice once I got started on my project.

When I got home, I laid out all my supplies on my table. I wanted to look at everything together and see if anything stuck out too much. I like to see everything together, so I can tell if it combines together in a cohesive way with my theme. I was happy with everything, but I did wonder if the Creative Café rubons would match my color scheme & theme. In the end, I only ended up using one from that set.

I had an idea in my head of how I wanted the inside pages to look, so I got to work.

Julie's Acrylic Album Class #3


I chose to cut my papers into a bunch of 2 ½” squares. I chose 2 ½” so that I could put four squares on each page and still have room for a small border around the inside and outside of the squares. After cutting the squares, I laid them out in groups of four, moving them around until I liked the layout of each group. What I decided, was that I would use one red, one blue and two neutrals on each page. I arranged the squares so that red and blue were at a diagonal to each other, with the neutrals in the other spaces.

I thought a lot about where I wanted these pages with this four square layout to appear in my album. I decided that the four square layouts should have the same layout on their back side, so that I didn’t have to worry about what would show on the back, since most of my papers were single-sided. This way, I could lay a square over another square of exactly the same size on the back page and not worry white would be showing through the acrylic.

I did a lot of thinking about the backs of my pages and what would be seen when I looked into each page of my album. I had never worked with acrylic before and was pleasantly surprised to see how nice it turned out. Before starting, I worked on my layout on my table and by drew sketches of my plans. In the end, I didn’t end up with an album that was exactly like my sketches. I changed things as I went along and thought of something different that would work better or when I realized the pieces in my sketch wouldn’t all fit on one page.

Julie's Acrylic Album Class #4


Pages 1 & 2 and 5 & 6

After much thought, I chose to place my four square layout on two complete pages (two acrylic sheets, both back & front) of my album. Behind the cover is the first set of four squares, I placed this layout on both sides of this first acrylic page (So the squares are on Pages 1 and 2 of the album.) My first step, after peeling off the protective page covering, (Be careful! I forgot to peel the covering off the back side of this page and had to remove my squares, peel it off and reattach the squares!), was to mix my paint to create the color I was looking for. I wanted a nice chocolate brown. I mixed brown, a few drops of black and about three times as much metallic gold as black and I was happy with the resulting color. I used a foam brush to apply the paint to about a 5 ½”x5 ½” area on my page. I applied the paint in one direction (vertically), so the grain would all be in the same direction. Next, I looked at my four square layout and rounded the outside corner of each square with my corner rounder. After rounding the corners, I laid each square down in the wet paint, pushing all over the square with my fingers to be sure there were no bubbles hidden underneath. I placed each square into the paint in this manner, leaving about a ¼” margin between the squares.

I liked the look of my four squares and moved on to cover the tab. I used the red bandana print to cover the tab. I liked the look of the paper and it’s also double-sided, which is a nice bonus, I didn’t have to cover the back side of the tab. I traced around the tab and cut out a piece with my scissors. I used Tim Holtz’s Distress Ink in Tea Dye to ink the edges of the paper. I adhered this piece to the tab with Diamond Glaze (using a foam brush to apply the glaze). The Diamond Glaze makes a nice, shiny surface and also acts as an adhesive.

After allowing my paint to dry, I turned the page over. The paint looked nice and was pretty transparent. I could see the backs of my squares on the other side. I used them as a guide to place my next set of squares on this page. I rounded the corners of these squares and inked them with the brown ink pad. I inked these squares because their edges would be visible and not hidden in the paint like the ones on the front side.


I used this same technique on what would become Pages 5 & 6 of my album. I didn’t want all of my pages to have the same layout. I only wanted one side of each double-page spread to have the four square layout. So when you open the album, Page 1, on the right is the four square layout. Turn the page and Page 2, on the left side is the four square layout. Turn Page 3 and then Page 5, on the right has the four square layout. Turn Page 5 and Page 6, on the left has the four square layout.

Friday, December 5, 2008

Julie's Acrylic Album Class #5


Pages 3 & 4

I was looking for a layout that would complement my four square layout when I came up with this layout. I choose two 2 ½ x 3 ½” rectangles mounted so that they overlap a 1 ½ x 5 ½” rectangle. I used my corner rounder on one corner of each rectangle, to coordinate with the four square layout. I inked the edges of the rectangles with brown ink and used extra brown paint from the four square layout to do the edges of the long rectangle. For the tab, I chose the red bandana paper, laying it down over the tag and tracing around the tag and edge of the album. Next, I used my scissors to trim along my line and my cutter to create a 1” band adjoining the tag. I inked this paper with brown ink and adhered it to the acrylic with diamond glaze. The diamond glaze creates a shiny coating on the paper when viewed from the back side of this page. The red bandana paper is double sided, with a stripe pattern on the back, so the tab and adjoining strip are striped on page 4. I used the same two 2 ½ x 3 ½” rectangles and 1 ½ x 5 ½” rectangle design on page 4, using the hermafix squares to adhere all the rectangles to both pages 3 and 4.

Julie's Acrylic Album Class #6


Pages 7 & 8

This page is the page just in front of the pocket page. I designed its elements to fit around the T that I stitched onto the pocket. I wanted to be able to see the T, so I used the Creative Café brown felt flower trim on the top and bottom to add some texture. I used an extra flower on the tab so the tab looks balanced when the album is closed. I cut two rectangles out of my double-sided papers and placed them on either side of the T. I used spray adhesive to adhere both the trim and the paper on this page.


The following photo is the back side of this page. No embellishments or paper were attached to this side of the page. This is an example of how nice the back side of the acrylic pages can look when some thought into their design.

Julie's Acrylic Album Class #7


Page 9

When I first saw these little pockets, I fell in love with them and set about trying to think of a creative way to use them. I knew since this pocket was red, I could find some way to use it in my acrylic album. I also knew that I wanted to somehow include my friend’s cute birthday invitations in her album. The invitation was huge (5 ¾” x 11”), so I wasn’t sure how to include it in a 6”x6” album. Once I started thinking about the pocket, an idea came to me. I would scan the invitation and print it small, so I could put it in the pocket as a tag. After printing the small invitation “tag,” I used a piece of red twine tied onto the corner, so that people would be able to remove the tag from the pocket. Now that I had decided how to use the invitation, I needed some embellishment on the pocket. Since I wasn’t able to find a T that was the perfect size for this album (mine were either too large or too small), I decided to stitch one onto the front of the pocket. I used thin ivory twine to stitch a large T onto the pocket. I have done a lot of counted cross stitch in my life, so I wasn’t intimidated by stitching. I just thought about how big I wanted the letter and got started. I used mostly a back stitch, but some of the stitch is some other stitch entirely, I’m not sure which one, but it turned out fine. I wasn’t looking for perfection, just to have a handmade look. You could use a white pencil to trace your design onto the felt, but I was in a time crunch by the time I got to this step, so I just jumped in & got started. After the T was finished, I thought it looked a little plain, so I added the flowers using blue twine.

I used my Wild Asparagus frames on the front & back of the pages with the pocket. I laid the first frame down and placed the pocket over it so the frame only showed a bit around the edges. I attached both pieces with spray adhesive. I applied some rubon flourishes from my KaiserCraft set around the pocket. On the back side, I plan to mount the second frame directly over the first one. I didn’t attach the second one before giving the album as a gift, so that my friend could place a photo on the page and place the second frame over it. I used a KaiserCraft birthday rubon on the second frame.


Page 10

This photo shows what the back of the album will look like (before a photo is placed in the frame). The pocket edges only show a bit over the top of the frame.

Julie's Acrylic Album Class #8

For the front cover, I chose the largest numbers I could find. I wish I knew the vendor for these numbers. I found them in a box in a cupboard at the store. I used the same paint on the numbers and T, that I had mixed for the background of my four square layout. I painted one side of the chipboard and all the edges. I left them on wax paper to dry and then painted their back sides.

For the numbers, I chose my favorite papers from my project stash to cover them. I like to apply paper to chipboard using spray adhesive. First, I go outside (spray adhesive has a strong odor and the sticky overspray is almost impossible to remove from things like the table, floor or your clothes). Then I hold the chipboard at an angle, so I can see where I’m applying the adhesive, I spray the adhesive onto the chipboard from about 12 inches away so that it is applied in a fine mist all over the project. If you hold the spray adhesive too close to your project, it gets too thick and can run or ooze out the sides of your paper. After the chipboard is coated with a fine mist of adhesive, I take it back into the house and lay the paper down over the adhesive. I smooth the paper down on my chipboard to make sure there are no bubbles and let it dry (about 30 minutes).

After the paper was attached, I used a foam brush to edge the numbers again, making sure the paint covered the edges of my paper. Next, I took a long piece of ivory twine and wrapped it around the bottom of the 0, tying a knot in the twine on the front of the 0 once I thought I had enough. I wanted it to resemble rope tied around the number. I did the same thing with the red twine diagonally across from the ivory twine. This time, after wrapping the twine several times, I put the ends of the twine through two of my Creative Café buttons (first a medium sized light blue button and then a smaller brown button with a carved edge) and tied a knot on top of the buttons. For both the ivory & red twine, I left about an 1 ½” ends after tying the knots.

After everything was dry and I was satisfied with my twine wrapping, I mounted the numbers on the cover of my album using a foam brush to apply diamond glaze to the back sides of each number. I pressed the numbers onto the cover and left them to dry overnight. The next day, I applied a birthday theme rubon on the back of the cover directly on top of the number 0, to give the back of the cover a little attention.

Julie's Acrylic Album Class #9


For my final embellishments, I replaced the silver hinged rings that came with the album with bronze rings. The bronze rings melded with my theme much more than the shiny silver ones. I’ll save those for a future project. After assembling the album pages on the rings, I cut a piece of thick twine. This thick twine is from my gardening supplies and works well to simulate rope in craft projects. I used the piece of thick twine to tie knots around each ring, so that a piece of twine ran between each ring. To this twine I tied a piece of coordinating ribbon and a piece of both red and blue thin twine. I did the same thing with the ribbon & twine between each ring.

I still had the brown painted T and thought it would be fun to use it in an unexpected way. I used a large needle (from my Making Memories tool kit) to poke a hole in the T and loop blue twine through the hole. I used the ends of the blue twine to tie a red button onto the front of the T. I then used the loop to hang the T from my top bronze ring.

When I set up the album and stepped back to admire it. I was very happy that after using so many different techniques learned from so many sources had come together to create what I felt was a cohesive decorative project.


My friend loved her gift and I still can’t wait to help her place her 40th birthday party photos in the album. I plan to help her decided which photos to include and which sizes to print them in. We’ll get together soon to do the last part of this project. I want to print the photos in sepia tone and in various sizes to complement the Western themes and colors I have so carefully created. I’ll take photos of the finished project and share them with you soon!

Tuesday, November 25, 2008

Acrylic Album Class Coming Soon...


I'm excited to share my latest project with you! I've got photos of everything I worked on for the creation of my first acrylic album. I made this album as a 40th birthday present for my friend Teresa, who had a big barndance for her birthday party. In preparation, I looked all over the store for papers & embellishments that had a Western look. Some were from our farm section, but others were pulled from other places, including our clearance papers. At first it took me a while to get my head around this project. I was worried about how to put together the pages when you can see down into the album and through the back of each page. But once I started, the project got easier as I went along. I'm taking all my photos on my Thanksgiving trip to Medford and promise to return with a DIY acrylic album class so you won't be afraid to give this beautiful medium a try. Happy Thanksgiving!

Tuesday, November 11, 2008

Julie's 10 Minute Mini Album Class #4


For a few final touches, use some embellishments from your stash at home. Or find some in the bulk embellishment section at our store. I used a little orange chipboard flower from the Creative Cafe collection, and put a copper brad through the hole. I adhered this to my page with glue dots. And finally for a special touch on the inside pages, I picked some paper maple leaves from my collection and used a glue dot to add one to the corner of each page.

My album was finished in 10 minutes, I couldn't believe it! Such a cute gift in so little time for so little money! Adding these last embellishments did take me an extra 5 minutes after I got home from cropping at the store, but I think they're totally worth it!

I encourage everyone to give this project a try! It's so nice to have that great feeling of accomplishment in such a short time! So many projects in scrapbooking take so long to complete, that it's nice to have a little ego boost to inspire your creativity! And my mom really loved her own album of her Little Pumpkins!

Julie's 10 Minute Mini Album Class #3


Next, use your scissors to cut the ribbon into 12 4" lengths. Take each piece of ribbon and tie it around the hinged ring. There is no particular order for tying the ribbon, but I like to mix my textures and prints so that each ribbon is next to one totally different from itself.

Julie's 10 Minute Mini Album Class #2


After punching each page, use your corner rounder
to round the corners on each page.

Open your hinged ring and place each page onto the ring, with the cover on top.

Julie's 10 Minute Mini Album Class #1


(Please do not copy our photos or text and paste into another site or print them out. Instead, please pass on a link to our site to anyone who may find this online class useful. Thank you!)

This mini-album is a great gift idea and only took me 10 minutes to complete...after I chose my papers and photos. I used 8 wallet size photos for this project. I choose wallets as the size for my photos when I ordered them from the Costco Photo Center. Costco's wallets come 4 to a sheet and are 39 cents per sheet. So each photo is about 10 cents each and for the total cost of $3.12 (8 sheets of 4 photos each), you could make 4 of these mini albums to use for gifts. Next, I chose my papers. I looked at my photos for and thought about the theme I was trying to create and the common colors in each photo. Since these were all pumpkin patch photos, I looked for papers with a Fall theme. I chose double sided patterned papers, so that I could have a little more variety in my patterns and so that the back of each page would look as nice as the front. Another plus about double sided papers for this project, is that they are thicker than most one sided papers. My Fancy Pants papers were 89 cents each, and I chose 3 papers for a total of $2.67. You could choose just one paper for the whole album if you like and then the cost would be less. With my 3 sheets of paper, I would be able to make 3 more albums, using my extra photos. Next I chose a hinged ring to match my papers and hold the album together (75 cents). After completing the project, I did end up adding a few embellishments from my collection for a little extra flair. Feel free to add as many embellishments as you like to your album. To save money, look through your stash at home first and see if you have anything that might match your theme and then bring them to the store when you're ready to choose your papers. You might have everything you need or just need to add a few things from the bulk embellishments section. I also chose to add ribbon to the ring on my finished project. The ribbons I chose averaged about $1.00 per yard and for one album, I needed about 4 feet of ribbon, so the cost was approximately $1.33 per album. As far as adhesives, anything you use to adhere your photos in your albums will work fine on this project. I used a brown Zig marker to write my title on the cover and glue dots to adhere my embellishments. As far as tools, I used my scissors to trim my photos and my large Fiskars trimmer to cut the paper. I used a regular sized hole punch for the holes and a corner rounder to round each page.

My total for 4 mini albums to use as gifts is $14.11 for supplies (not including extra embellishments & adhesives). So the cost for each mini album works out to be about $3.53. I think these are wonderful gifts for moms, dads, grandmas & grandpas, aunt & uncles. Use this mini album format to showcase your kids, their hobbies, your pets, your travels and so many more wonderful events!

Let's get started!

First use your scissors to trim your 8 wallet size photos (2 1/2" x 3 1/2"). You can either trim them with a white border or trim off all the white. Next take your double sided patterned paper and cut 9 4" x 3" rectangles. The extra piece will be your album cover.

Experiment a little with your photos and each paper, lay each photo on the front & back of each paper, checking to see which mix you like. I laid mine all out on the table to see which order I wanted both the photos and the patterns to be in. But don't worry too much about this part! When you choose the papers to coordinate with your photos, you took care of the hard part! What takes the most time in scrapbooking is deciding what to do. So if you're looking for a quick project, try to not spend so much time worrying and spend more time getting the project done! You'll love it in the end and it will look great!

Use your choice of adhesive and mount the photos on the papers. Think of a cute title for your album and use a marker to write it on the cover. Next, take each rectangle and punch a hole in the corner. I punched one of the photo pages first and then held each of the next papers behind it, one at a time, using the first hole as my guide, to be sure my holes were all in the same place.

Monday, October 27, 2008

10 Minute Mini Album Class

This project was a last-minute idea of mine when I was working the crop last Friday night. I was making a pumpkin patch page with the kids' pictures. Since I was using wallet size photos printed from Costco, I had 3 extra of each picture. I was wondering what to do with the extras while I made my layout and an idea came to me. I could make a mini album for my mom that she could carry in her purse and share pictures of her grandkids with friends. I cut each wallet size photo with a white border and measured them. They were 2 1/2 x 3 1/2 inches and I had 8 of them. I looked around the store and found 3 sheets of double-sided, printed paper from Fancy Pants True Papers collection. I grabbed one copper hinged ring and a hole punch.

I'll finish the rest of this project post soon! :) -Julie

Friday, September 19, 2008

Bo Bunny Chipboard Album Class #5 - Ribbon, Ribbon & More Ribbon


On of the things I love about the Bo Bunny My Word albums is that I can go crazy with one of my favorite embellishments....RIBBON! I like to squeeze in some ribbon where ever I can, in my projects. For this album, I chose lot's of white background ribbons with dots & words like...party, celebrate, birthday. I also picked some lime green shimmery ribbon, a red sheer ribbon with a swirl pattern and a medium blue rick-rack. I don't have too much rhyme or reason to how I pick the ribbons. I usually grab all the ribbons I can find in the store that are coordinate with my paper and make a pile of them on the counter on top of the paper. I try to pick a variety....pattern, solid, printed, shaped (like the rick-rack). I think a bit of everything mixed together looks great in a project like this.


I buy about a yard & a half of each ribbon for a project like this. Next, I cut the ribbon in 4 inch pieces. Since there are 3 rings, I cut three 4 inch pieces. I use the rest of the ribbon to tie on the letters and to decorate the inside of the album. Take your 4 inch pieces and tie them, one at a time, onto the rings. Being a type A person, I divide my ribbon so that each ring has a piece of each ribbon. You can do it however you like, really, one can have too much organization in her life! I just tie the ribbon around the ring once, so that there aren't too many big knots taking up room on the ring and I like the ribbon ends to be a bit longer.


For my PARTY book, I used 7 different ribbons. The number is up to you. If I found wider coordinating ribbons, I would probably only use 5 or so. I think it really depends on how many ribbons you find that you like. As far as ribbon goes, I'm not a "less is more" kind of girl!

LinkWithin

Related Posts with Thumbnails